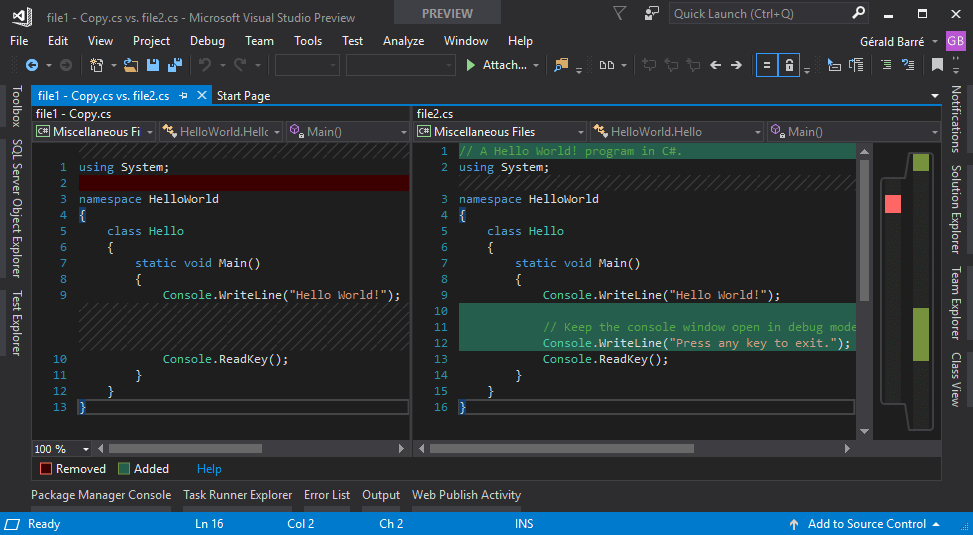
The diff tool of Visual Studio is very good to compare 2 files. You can use it to compare two versions of the same file directly in Visual Studio. But you can also use it to compare 2 files that are not in a solution.
#Using the command line
- Open the developer command prompt from the start menu, so
devenv.exe is already in the path - Use the following command line:
Shell
devenv /diff file1.cs file2.cs
#Using the Command Window in Visual Studio
If you have already opened Visual Studio, you can use the Command Window to diff files.
Open the Command Window using the Quick Launch or using the keyboard Ctrl+W, A
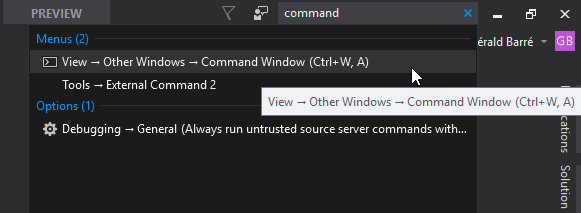
Using the command Tools.DiffFiles with the 2 files to compare:
Shell
Tools.DiffFiles "file1.cs" "file2.cs"
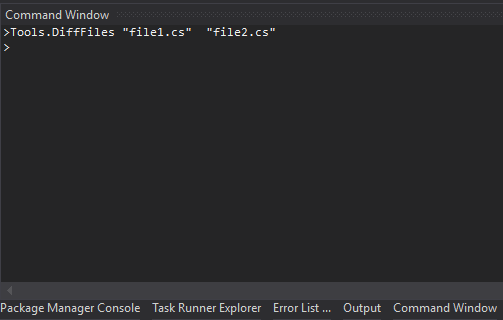
You'll get the same result as with the command line:

#Using the File Differ extension
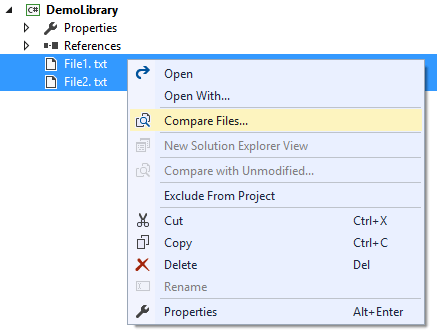
The File Differ extension allows to compare files from the Solution Explorer:
#Using Visual Studio as a git difftool and git mergetool
git difftool is a Git command that allows you to compare and edit files between revisions using common diff tools. You can use any editor that supports diff such as VS Code. You can change your git configuration directly from Visual Studio.
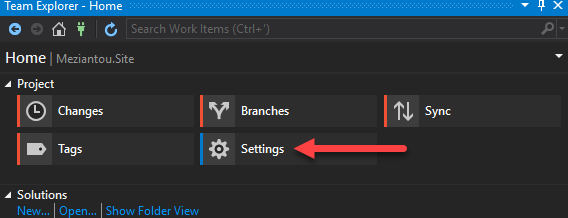
Open Team Explorer (View / Team Explorer)
Click on the "Settings" button
Select "Global Settings"

Click on the "Use Visual Studio" buttons
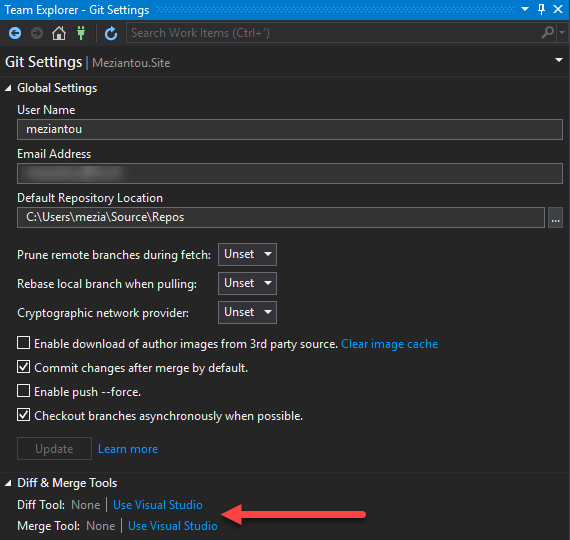
Here's the .gitconfig file after clicking on the buttons:
INI
[diff]
    tool = vsdiffmerge
[merge]
    tool = vsdiffmerge
[mergetool]
    prompt = true
[mergetool "vsdiffmerge"]
    cmd = \"C:\\Program Files (x86)\\Microsoft Visual Studio\\Preview\\Community\\Common7\\IDE\\CommonExtensions\\Microsoft\\TeamFoundation\\Team Explorer\\vsdiffmerge.exe\" \"$REMOTE\" \"$LOCAL\" \"$BASE\" \"$MERGED\" //m
    keepBackup = false
    trustExitCode = true
[difftool]
    prompt = true
[difftool "vsdiffmerge"]
    cmd = \"C:\\Program Files (x86)\\Microsoft Visual Studio\\Preview\\Community\\Common7\\IDE\\CommonExtensions\\Microsoft\\TeamFoundation\\Team Explorer\\vsdiffmerge.exe\" \"$LOCAL\" \"$REMOTE\" //t
    keepBackup = false
This post is part of the series 'Visual Studio Tips and Tricks'. Be sure to check out the rest of the blog posts of the series!
Do you have a question or a suggestion about this post? Contact me!